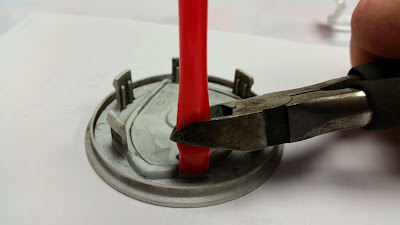
Custom wheel center caps not only add character and style to a vehicle, they also protect the internal components of the wheel. However, over time, center caps can become damaged due to collisions, wear and tear, or the weather. This article will detail how to repair your custom wheel center caps to help you restore their original appearance and functionality.

I. Assess the extent of the damage
Before you begin the restoration process, you first need to assess the extent of the damage to the center cap. Common problems include:
Scratches and abrasions: the surface may show minor scratches or abrasions.
Peeling or breakage: parts of the center cap may fall off or break due to impact.
Faded color: The color of the center cap may fade after prolonged exposure to sunlight.
Depending on the type of damage, choose the appropriate repair method.
Preparation of Repair Tools
The tools and materials needed to repair the center cap include:
Fine sandpaper: for sanding the surface.
Cleaner: for cleaning the center cap.
Paint refinisher or spray paint: for recoloring.
Glue or plastic soldering tool: for repairing broken parts.
Polish: for restoring the luster.
Repairing Steps
- Clean the center cap
Clean the center cap thoroughly with a cleaner to remove dirt and grease. This step is critical to ensure that the restoration goes smoothly. - Sand the surface
If the surface of the center cap is scratched or worn, gently sand the damaged area with fine sandpaper. This will help smooth the surface in preparation for staining or painting. - Repairing breaks
Broken center caps can be repaired using a strong glue. Apply the glue to the broken area, stabilize it, and wait for it to dry. If the break is severe, consider using a plastic welding tool. - Recolor
If the color of the center cap is faded or scratched, recolor it with a paint refinisher or spray paint. Select a paint similar to the original color and apply it evenly to the area to be repaired. It is recommended to apply the paint in layers, each layer drying before applying the next one for better results. - Polishing
Once the paint is completely dry, use a polishing compound to polish the center cap to restore its luster. This step can significantly enhance the appearance of the center cap. - Installation back to the wheel
Once the repair is complete, install the center cap back into the hub. Make sure that the center cap is firmly fixed to avoid it coming off again during driving.
V. Regular Maintenance
After the repair is completed, check the condition of the center cap regularly and clean and maintain it in time. Avoid prolonged exposure to strong sunlight. Protective wax can be used to extend the service life of the center cap.

Conclusion
With the above steps, you can easily repair your custom wheel center cap and restore its beauty and functionality. Regular maintenance will also ensure that the center cap stays in good condition for a long time, keeping your car looking like new. Whether it’s for aesthetic reasons or to protect your vehicle, restoring your center caps is a worthwhile investment. We hope these tips will help you complete your restoration successfully!

